
Creating products in aronium is very simple. In this article you are going to learn how to add product groups, products, editing and deleting products, and generating barcode for products
.jpg "Thumbnail")
Create product group in Aronium
Open Aronium POS and go to Menu. The menu is marked with an arrow.

Go to the Management section which is marked with an arrow.

Click on Products tab which will open products page. Currently, we have no products.


If you are using visual mode then it's better to use image and colors for your groups.

You can edit an existing group by selecting it and clicking the edit group button.

You can rename it or make it a subgroup of another group or simply make it a single group.

A group can be deleted , if it is empty or not used for any products. To delete a group you simply select the group and click the delete group button.

create products in Aronium POS
From the products page click New Product button.

A side page will open with different fields and options to create a new product. Only Name field is required, others are optional. Options have default value, but you can change them.


You can give your products a manual code too. If you do not change it manually, it will create one sequentially for each product after the first given code. I entered a code for this product, I would let other products be coded by the application.

You can type a product's barcode here or use a scanner to add the barcode. If your product doesn't have a barcode use Generate barcode button to add a unique barcode for your product. In the example below I have used this option to generate a barcode for my product.

Unit of measurement:
Use this field to define a unit of measurement of for your product. For example; each, bottle, Kg, ...etc.


To be able to buy or sell a product you have to keep this option active. And, when a product is no more used, you can turn off this option for that product.

This indicates at least one. If you turn off this option, you will have to type the quantity each time you make a sale. Always keep this option on.


Use this option if you really have to, because every time you sell a product with age restriction defined, it will tell you to confirm the customer's age.

Add any necessary information about the product in this field.

This is how I filled the necessary information on the first page of adding a new product.

Go to the next page of adding a new product.

If you have predefined taxes, it will appear here. You can select one for your product.


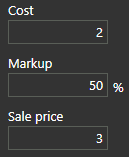
You can add the markup manually or when you add the sale price it will calculate it automatically.

Sale price can be automatically entered based on the cost price and the markup or you can just type it in.

Keep this option active if your sale price includes tax, otherwise deactivate this option.

Be careful with the use of this option too. Once you activate this option, it will keep popping up every time you are going to sell the product.


If the product is going to be bought from a specific supplier, then select it here. Leaving this field with default value (none) is better.

At what quantity level do you want to reorder the product? Specify it here.

How many of the product do you want to have in stock, preferably. Specify it here.

If you Aronium to warn you once the product reaches a certain quantity, then activate this option. Below the option, there is a field for the quantity to write.

It will start warning you when the stock level of the product is lower than 24.


This is where you write your comment on the product and add it to the box below using Add button. After you have no more use for the comment, you can delete it using Delete button.
I really wouldn't recommend using Comments, because they will be shown every time you add the product for sale. So, only use it when you have to.


Browse an image of your product from your computer and add it to Aronium.


After adding an image of your product it will be shown on the same page. Using the Clear button you can delete the image.

I have entered all of the information required to record a new product, now I am going to save it.


After saving the product, it will be shown in the page.

Edit a product:
Select the product and click the edit product button to edit it. You can also double click a product and edit product window will open.

Once the window is open, you can alter all of the previous information, including name, barcode, cost and sale price. Editing a product is an important function, specially in regards to price change. You'd have to change the prices every now and then.


Before edit:

Delete a product:
Deleting a product is only possible if it has got no transactions attached to it. You have just created a product and you haven't bought or sold that product you can delete it. What you can do is, make the product that is no more in use inactive. That way you won't have to deal with it anymore. And, when you need it again, you can activate it.

To deactivate a product, double click it and turn off the Active option, then save your changes.


.jpg)
.jpg)
.jpg)
.jpg)

.jpg&description=How to Create Products in Aronium POS? A Very Detailed guide with Images)
0 Comments